Showing posts with label Organization. Show all posts

Tuesday, March 10, 2015

Chalkboard Labels: Organizing Our Office / Craft Space

Labels, Chalkboard, Chalk, Organizing, Crafting, Pantry, Craft Room, Office
I was provided free product in exchange for an open & honest review.  All opinions are my own.  No other compensation was exchanged.

When you move into a new house there are about 1 million things on your to-do list.  While we have gotten a few thing on our list checked off, one thing that I haven't gotten to yet and would desperately like to is to organize our office / craft space:


Labels, Chalkboard, Chalk, Organizing, Crafting, Pantry, Craft Room, Office
Pretty crazy isn't it??  To be fair, the plants are my parents...hoping when they move out I can attack this mess!
I thought that these chalk labels would be a great way to organize this space since I have a horrible habit of moving things around.  Chalkboard  labels can easily be changed!  While they don't look as clean...the finished product is still okay:


Labels, Chalkboard, Chalk, Organizing, Crafting, Pantry, Craft Room, Office
I erased the top label.  You can tell...but it isn't really that obvious.


And they are sooooo cute!  Since my office isn't quite ready to label.  I decided to attack a small portion of my pantry!  :)


Labels, Chalkboard, Chalk, Organizing, Crafting, Pantry, Craft Room, Office
Cohesive and super cute!  And now my mom doesn't have to open every container in the cupboard to find what she's looking for!  ;)

I actually wrote these while the labels were still on the sheet:


Labels, Chalkboard, Chalk, Organizing, Crafting, Pantry, Craft Room, Office
I definitely recommend this method...

The alternative is to write on the label after it is placed.  For flat surfaces this would probably work okay.  However, for anything with a curve, it isn't an ideal method...


Labels, Chalkboard, Chalk, Organizing, Crafting, Pantry, Craft Room, Office
I wrote on this label after I put it on the jar....not horrible, but it would have been better if I wrote on the label before I placed it.

I was pleasently surprised that Hubby noticed this label which is saying something to how much they can change the look of something.  He is, like most males, pretty unobservant.  When he got home he asked what I was up to and I told him I was working on a review.  "Oh, is that why there's a label on the pencil jar?"  I was taken aback.  He never notices things like that!

My plan for the office means putting labels on jars like the one above plus on the actual cupboards:


Labels, Chalkboard, Chalk, Organizing, Crafting, Pantry, Craft Room, Office
Three labels on this cupboard.....

Labels, Chalkboard, Chalk, Organizing, Crafting, Pantry, Craft Room, Office
And three labels on these cupboards (yes, our washer & dryer are currently in the same room...but that will change eventually)

The only complaint that I have is that the labels were sometimes a little bit difficult to remove from their backing.  I kept peeling the paper and couldn't get the label.  Without my nails, I'm sure I would have gotten extremely frustrated.

However, the pros definitely outweigh the cons!  Not happy with the size?  You can actually cut these to whatever shape or size you want!  The really neat thing I like?  There is a 100% Lifetime Promise.  These labels are built to last.  If at any time you are unhappy with these labels (for any reason), let them know and they will replace them or give you a refund, no questions asked!

The possibilities are endless for how you could use these chalkboard labels.  Here are just a few:

  • Craft Rooms
  • Office
  • Closets
  • Laundry Room
  • Entry Space or Coat Closet for kids
  • Toy Area
  • Party Foods
  • Classrooms
The list goes on...

You can purchase these on Amazon here:


And for a pretty decent price!

What would you use these labels for?

Friday, August 8, 2014

Giveaway & Review: Custom Stickers from StickerYou *CLOSED*


You all probably know by now that we moved into our new home in January.  Since then we've been slowly working on projects throughout the house.  Not to mention preparing for our little Sprout.  Most of the time this means that things are terribly unorganized....which I hate.  But between house projects, work, and growing a baby...I'm usually too tired to bother with organizing.  Which is why there are stacks of baby clothes all over the living room.  ;)  They are organized by size but not put anywhere.  lol.

Anyways...StickerYou provided me with a solution to one of the things that has been driving me crazy!  Our spice drawer.

A beautiful mess right?

A couple of years ago, Pinterest inspired me to put our spices in baby food jars, label the lids, and stick them in a drawer.  Which, honestly, I love.  No more rooting around a cabinet - I can see what's what with just a quick look.  And yes, I do need more baby food jars to get some of those other spices transferred.  I did blog about the process way back when here.  But there are a couple of things I really dislike (which are noted in that post):

1. I used acrylic paint because I'm cheap and it's what we had on hand.  Because of that it scratches off easily and doesn't have a nice finished look.  

2. I hand wrote, with a Sharpie, the names of the spices on the lids.  My handwriting is horrible.  It's legible but really not very pretty.  I should have had someone else do it.  Even Hubby's handwriting would be nice - being a designer, he is pretty particular.  ;)

Now, thanks to a whole-house remodel, we have plenty of spray paint on hand.  And most of it is for use on metal.  :)  I have two ideas I had been playing around with.  One, I could paint the lids cream to match the trim in our kitchen.  Or, I could paint them to match these awesome salt & pepper shakers we found at a flea market (tops were originally a rusty black):

Definitely a find I am proud of.  :)

When I got word about this review for StickerYou, I started searching for stickers for Baby Girl's room.  Except I have no idea what her storage looks like yet, so I couldn't really settle on anything.  Then I got the idea to find something for our spices.  And I stumbled across these beauties:

Ornate.

Lovely.

Aren't they super cute!?!  And they match our kitchen perfectly.  I think on top of that bronze color paint, they will really pop!  I took a picture to give you a rough idea of what I'm going for - but I haven't painted yet so you have to use your imagination:

A little rough...I know.

I did think they were going to be a bit bigger.  But that is not StickerYou's fault at all.  I remember reading that they were 1 inch by 1 inch.  I just thought an inch was bigger.  ;)  I am horrible at judging size and distance.  I should have known better.  But I think with some of that bronze paint and someone else's handwriting I will be very pleased with the finished result.

Super thankful for the fun way to organize and beautify our kitchen.  :)

Overall, the stickers are fantastic.  The process to create them was so simple.  And these specific stickers would be great for weddings or showers - you could add text or a picture to each one (though I'm fairly positive it has to be the same thing for every one...which is why I didn't do it).  They have some awesome ideas for personalizing an event:


Cute right??
  They have SO many awesome options to choose from!  You can get stickers for jelly jars, girly stickers, manly stickers, anything you can think of!  You can even make temporary tattoos, car decals, magnets, iron-ons, or wall decals!  The options are pretty much endless.  They are high quality and I am confident that they will last a very long time.  Once we get a little more settled I'll probably be looking to get some more!  :)  Check out this adorable video for a peek at all they have to offer:


To Buy: Head over to the website here to see what kind of stickers you can come up with! 

To Win: One reader will receive 2 pages of their very own custom white vinyl stickers - rush shipping included!  That's a $37 value!
  
I received one or more of the products mentioned above for free using Tomoson.com. Regardless, I only recommend products or services I use personally and believe will be good for my readers.

Saturday, July 28, 2012

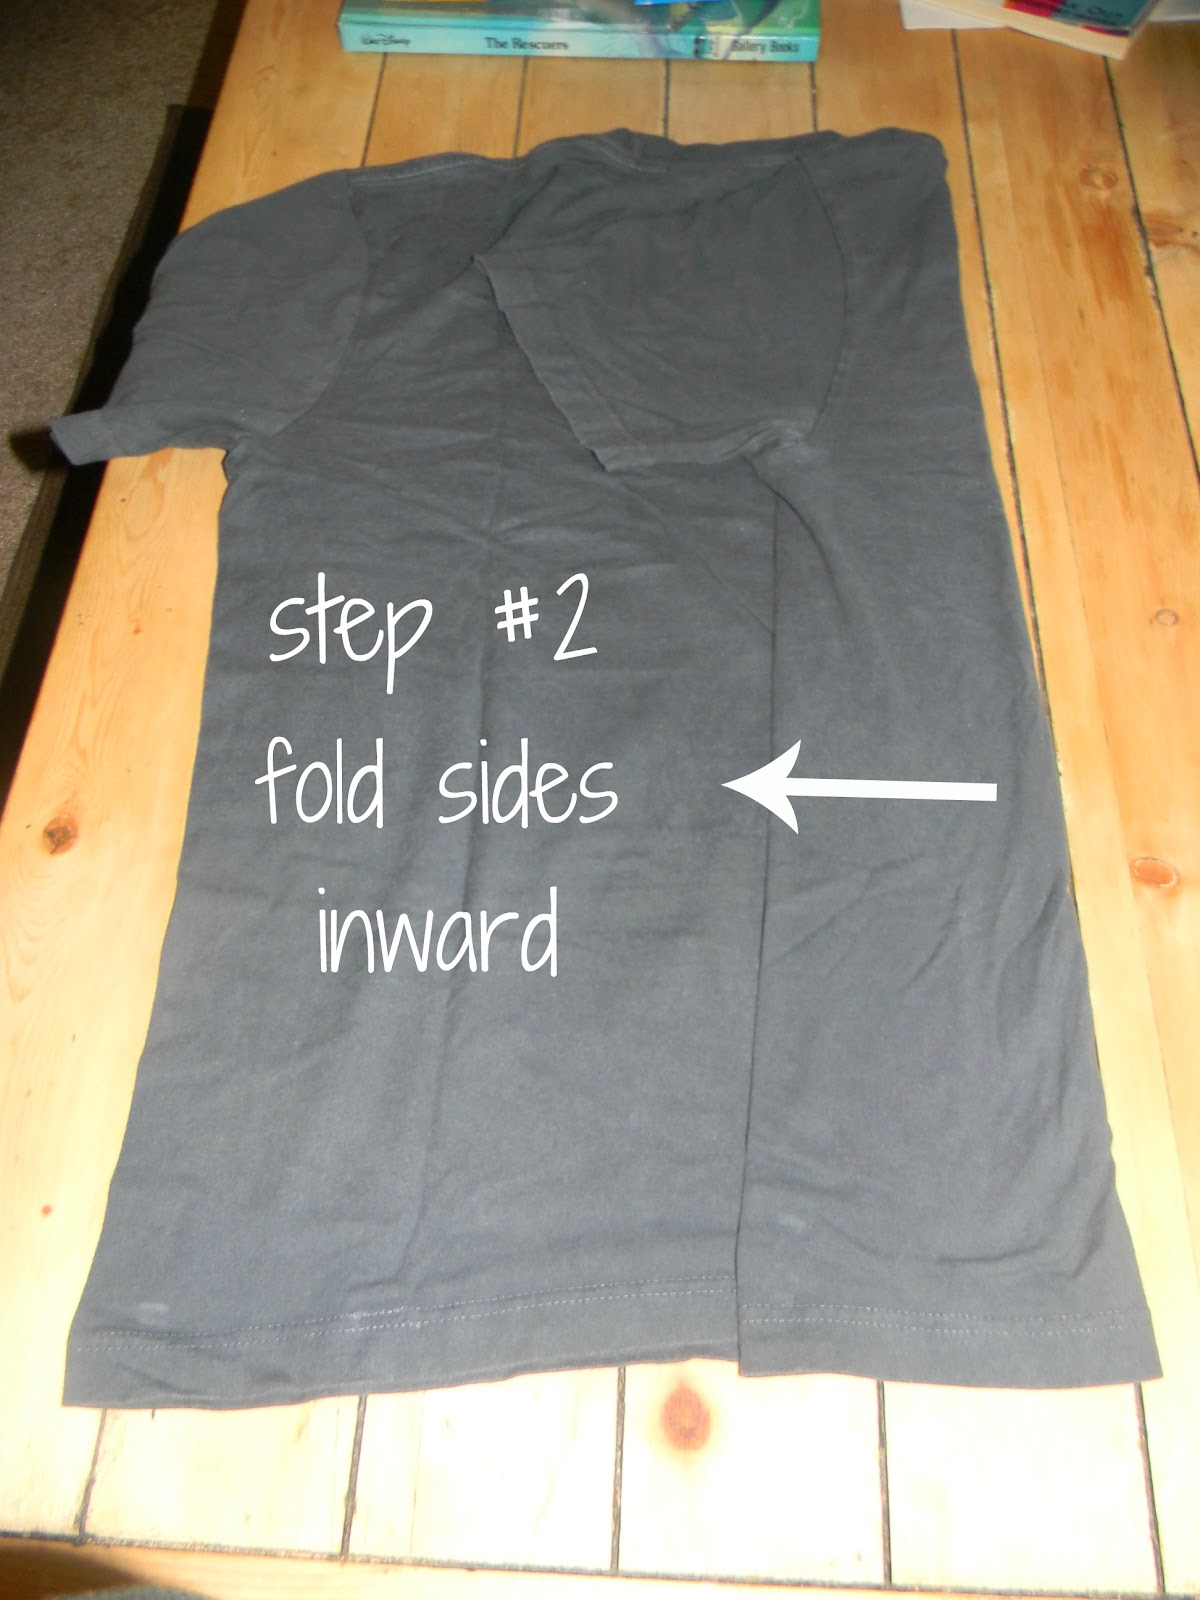
Folding Shirts = Happier Hubby

Justin and I are forever frustrated with his t-shirts.  I fold his shirts and put them away, trying my best to keep it so he can see which one is which - but there is only so much space!  I would get back in the drawer after doing laundry the next time and it would just be a mess.  Nothing we fought over - just something I wish could be fixed.  And then Pinterest saved the day!  

I discovered a new idea over at Darkroom and Dearly.  However, I merely used her idea - when I decided to try it, I folded all by myself without her instructions - I just folded how I usually do and then added an extra fold.  So, beware, if you check out both blogs, our folding methods may vary.  :)

Anyhow - this is what the drawer looked like after I refolded:


And here are the steps for folding:


Here's to better organized drawers!  Happy folding!

Wednesday, May 16, 2012

Pinterest Accomplished!


Thought I would share a couple of the projects I've taken off of Pinterest - and succeeded!  

Even though I finished this project awhile ago (in November when I discovered it on Pinterest) I thought I would share - a Memory Jar!  My husband was a little skeptical of the idea at first.  What guy wants to write down memories and stick them in a jar?!?  But I made him. (Just remember to put it in a place he will see everyday - for Justin, that means the dining room table where he eats breakfast and does his devos everyday).  The pin I had seen had the family opening the jar and reading the memories together on New Years.  Since we didn't start our jar until November, I thought it would be best to postpone until our anniversary (March 19th).  So last week, we sat down to read our memories - some on post-its, some on notebook paper, others on the back of receipts.  It was SO much fun!  We laughed so hard and I even got emotional a couple of times.  And yes, my hubby did enjoy it.  He even mentioned wishing we had more memories and things he would have written if we'd had the jar before November.  I am so excited for our next anniversary!  And I'm looking forward to doing this when we have kids.  

I simply took a Mason Jar - removed the seal part so we could just drop our memories in and added a few stickers on the front.  It's kind of empty now - but it can fill up pretty fast.  Here is the finished product:


Update: 

I went ahead and made a jar for a wedding gift and I'm super excited about it!  I thought it was a super cute idea.  See?


Now onto the spice jar project... I hated our mess of a cupboard shelf full of herbs and spices - It took 5 minutes to find what you were looking for, stuff usually fell out onto the counter, and there was no organization whatsoever.  I'm proud to say, thanks to Pinterest, that we now have a much better system.  I used baby food jars!  First I removed the labels from the jars (this was quite a process...even with help from Pinterest).  But they look good (at least I think so...)!


Then I painted the lids with acrylic paint I already had (probably would have worked better with a metal friendly paint or spray paint...but I used what I had).  After a few coats of paint had dried, I filled each jar with an herb or spice and labeled each lid with a permanent marker.  My handwriting is pretty bad, so please don't judge...I should have had my hubby do it.  

Now, I keep our spices in drawers and you can find what you need with a simple look - no more digging, no more falling, MUCH more organization...and it looks nice!  I love it (and I think my hubby loves it too)!

Thanks for reading - if you have done something similar - please share!  I love to see what other people have accomplished with their creativeness!

Organization & Date Night


Leave it to Pinterest to show me how to organize date night - and make it fun!  

Let me introduce you to what I call Date Night Pick 'N' Pull: 


I found the original idea for this here and then tweeked it a little bit to suit my taste (and I hope you will do the same if you like the idea).  You could use anything to hold the sticks - a jar, a cup (leftover from our wedding centerpieces), or even a can covered in some cute scrapbook paper!  :)  
I painted the sticks with acrylic paint because it was what I had but I'm guessing it would be much easier with spray-paint or maybe even markers... And I wrote with colored pencils (it was the only thing that would show up on black!)...pardon my handwriting.  

You could easily change the categories to suit your needs...I'm just SUPER particular about our budget so I tried to give us a lot of options.  The attached "key" was made on Publisher...which I LOVE for crafty projects like this!  

And BONUS!  - Justin even thought this would be fun for date nights...he likes to be a little spontaneous.  But, yes, I had him approve the list of date ideas before I started making the sticks!  Speaking of, after I made my own list I got a few other ideas from these two blogs: The Dating Divas and Six Sisters' Stuff.  They both have some really great ideas.  Some are simple and others are rather extravagant - just pick what suits your taste!  We haven't actually tried it but I'm very hopeful and I will definitely let you know how it goes!

Along the lines of organization, I also got this great idea from Pinterest:

A cereal box re-purposed into an organizer!


The tutorial can be found here.  I had a different sized cereal box so I had to adjust measurements but it still wasn't very difficult.  Just pick out 3 sheets of coordinating scrapbook paper and some cute stickers or embellishments and you're set!  

We use this ALL the time.  All the clutter that gets left on the kitchen table or coffee table or recliner (in our case) when you walk in the door - goes in the box!  The down side - eventually all of that clutter has to go somewhere...so, yes, you will have to go through the organizer eventually.  But being a little organized helps in the mean time!

Hopefully I've inspired some creativity!  Have fun crafting!